Few things can disrupt your daily routine faster than discovering your RV gray tank not draining properly. You’re trying to manage your household wastewater like you do every week, but instead of the satisfying whoosh of water flowing out, you’re met with a stubborn tank that refuses to empty. This frustrating situation can quickly escalate from an inconvenience to a serious problem that affects your ability to use your sinks and shower—essential parts of everyday life when your RV is your home.
The problem of an RV gray tank not draining is more common than many full-time RVers realize, and it typically happens at the worst possible times—in the middle of your weekly routine, right before guests arrive, or when you’re already dealing with other household issues. What makes this particularly challenging when you’re living in your RV full-time is that you can’t just avoid using your plumbing system while you figure it out. You need running water for cooking, cleaning, and bathing every single day.
Understanding why your RV gray tank not draining occurs is crucial for maintaining a functional home. Gray tanks collect wastewater from sinks, showers, and sometimes washing machines, which means they’re constantly dealing with soap residue, food particles, hair, grease, and other debris from daily living. Unlike fresh water systems, gray tank systems rely on gravity and proper venting to function correctly, making them susceptible to various issues—especially with the heavy, consistent use that comes with full-time living.
The good news is that most RV gray tank not draining problems can be resolved with proper troubleshooting and maintenance techniques. By understanding the common causes and having a systematic approach to diagnosis and repair, you can often restore proper drainage without expensive professional service calls or having to leave your home for repairs. However, knowing when to attempt DIY solutions versus when to seek professional help is equally important for preventing damage to your RV’s plumbing system and avoiding extended disruptions to your daily life.
Several factors could cause the gray tanks in an RV not to drain properly. Here are some common causes and potential solutions:
1. Clogs or Blockages: The Most Common Cause of RV Gray Tank Not Draining
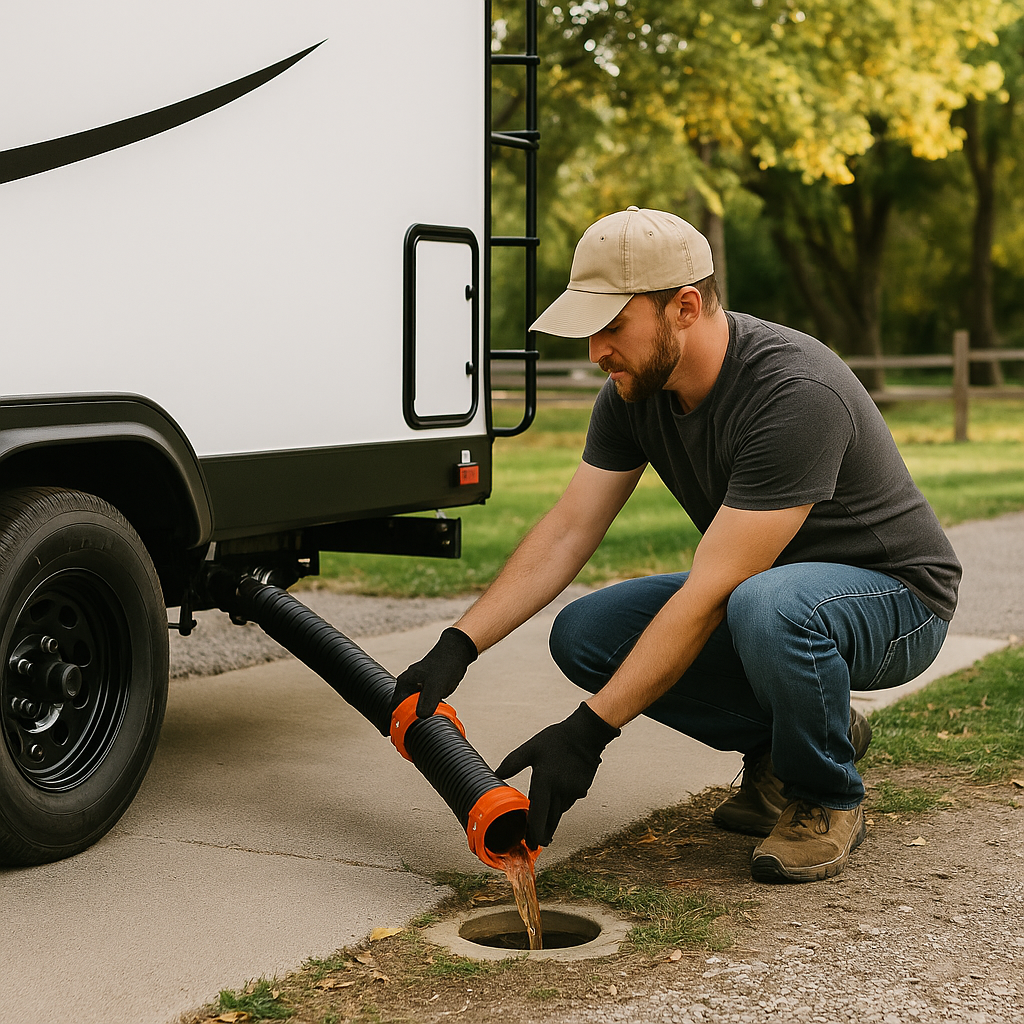
The gray tank drain system can get clogged or blocked by debris, food particles, soap scum, or other materials. To resolve this issue, try using a specialized RV drain cleaner or a mixture of hot water and dish soap. Allow the solution to sit in the tank for a while before flushing it out. Using a tank wand or a high-pressure water hose attachment, gently flush the tank to dislodge any obstructions.
Common Blockage Sources:
- Food particles from kitchen sink drainage
- Soap scum buildup from shower and sink use
- Hair and personal care products from bathroom drains
- Grease and oil from cooking and dishwashing
- Toilet paper or other debris accidentally disposed of in gray water drains
Effective Blockage Removal Techniques:
- Hot water flush: Fill tank with hot water and let it sit for 30 minutes before draining
- Dish soap treatment: Add 1 cup of liquid dish soap (grease-cutting soap like Dawn Ultra is particularly effective) to help break down grease and soap scum.
- Baking soda and vinegar: Natural cleaning combination that helps dissolve organic buildup
- Commercial RV tank cleaners: Specialized products designed for gray water systems
- Tank wand flushing: Use a tank wand to create turbulence and dislodge stubborn clogs
Prevention Strategies:
- Install sink strainers to catch food particles and debris
- Use biodegradable soaps that break down more easily
- Regularly flush tanks with hot water to prevent buildup
- Avoid disposing of grease or oil down gray water drains
- Use enzyme-based cleaners monthly for preventive maintenance
2. Valve Issues: Mechanical Problems Preventing Proper Drainage
The gray tank’s drain valve may not be fully opening or closing, which can hinder proper drainage. Check the valve for any obstructions, such as debris or buildup, and clean it if necessary. If the valve is damaged or not functioning correctly, it may need to be replaced by a qualified technician.
Common Valve Problems:
- Partial valve opening due to debris or corrosion
- Worn valve seals that prevent complete closure or opening
- Bent or damaged valve handles that don’t operate properly
- Frozen valves in cold weather conditions
- Corroded valve mechanisms from exposure to wastewater
Valve Troubleshooting Steps:
- Visual inspection of valve handle and mechanism
- Exercise the valve by opening and closing it several times
- Check for debris around the valve seat and mechanism
- Lubricate moving parts with appropriate RV-safe lubricants
- Test valve operation with water flowing to ensure proper function
When to Replace Valves:
- Cracked or damaged valve bodies that cannot be repaired
- Seized valves that won’t operate despite cleaning and lubrication
- Persistent leaks from worn seals or gaskets
- Valves over 10 years old that show signs of wear
- Corrosion damage that compromises valve integrity
3. Venting Problems: The Hidden Culprit Behind RV Gray Tank Not Draining
Proper venting is crucial for the gray tank to drain effectively. If the vent pipe or vent cap is blocked or clogged, it can create a vacuum or airlock, preventing the tank from emptying. Inspect the vent pipe and cap for any obstructions and clear them out if needed. In some cases, the vent pipe may need to be replaced or extended to improve ventilation.
Understanding Gray Tank Venting: Gray tanks require proper ventilation to allow air to enter as water exits, preventing vacuum formation that can stop drainage. The vent system typically includes a vent pipe that extends through the roof and a vent cap that prevents debris from entering while allowing air flow.
Common Venting Issues:
- Blocked vent caps from leaves, bird nests, or debris
- Frozen vent pipes in cold weather conditions
- Damaged vent pipes from weather or physical damage
- Inadequate venting due to improper installation or design
- Vent pipe separation at joints or connections
Venting System Maintenance:
- Regular roof inspections to check vent cap condition
- Seasonal cleaning of vent caps and visible portions of vent pipes
- Snow and ice removal from vent caps during winter camping
- Professional inspection of vent pipe integrity annually
- Vent cap replacement if damaged or deteriorated
Signs of Venting Problems:
- Slow draining despite clear valve operation
- Gurgling sounds when other drains are used
- Sewer odors inside the RV
- Incomplete tank emptying even with proper valve operation
- Backup of water in sinks or showers
4. Tank Sensors: Addressing Inaccurate Readings in RV Gray Tank Systems
Malfunctioning tank sensors can cause inaccurate readings, leading to the perception that the gray tank is not draining. Clean the tank sensors by using a specialized sensor cleaner or a mixture of vinegar and water. If the sensors continue to provide inaccurate readings, they may need to be calibrated or replaced.
How RV Gray Tank Sensors Work: Most RV gray tanks use probe-style sensors that detect water levels through electrical conductivity. These sensors can become coated with soap residue, minerals, or other debris that affects their accuracy.
Sensor Cleaning Methods:
- Vinegar solution: Mix equal parts white vinegar and water, let sit for several hours
- Commercial sensor cleaners: Use products specifically designed for RV tank sensors
- Calgon water softener: Dissolve in hot water and let sit overnight
- Dish soap and hot water: Helps remove soap scum and grease buildup
- Enzymatic cleaners: Break down organic matter that coats sensors
Sensor Replacement Indicators:
- Consistently inaccurate readings despite cleaning
- Sensors that don’t respond to water level changes
- Corroded or damaged sensor probes visible during inspection
- Sensors over 15 years old that show signs of deterioration
- Electrical continuity problems detected during testing
Advanced Sensor Troubleshooting:
- Multimeter testing to check sensor electrical continuity
- Monitor panel calibration if available on your RV model
- Sensor wire inspection for damage or corrosion
- Ground connection verification for proper sensor operation
- Professional diagnostic testing for complex sensor issues
5. Tank Sloping or Leveling: Ensuring Proper Drainage Angle
Proper tank sloping and leveling are essential for effective drainage. If the RV is not leveled correctly, it can result in pooling of water in the tank or prevent it from fully draining. Adjust the RV’s leveling jacks or blocks to ensure proper slope and drainage angle for the gray tanks.
Understanding Gray Tank Drainage Physics: Gray tanks rely on gravity for drainage, which means proper slope from the tank to the drain valve is crucial. Even a slight deviation from optimal slope can cause water to pool in the tank, leading to incomplete drainage and potential odor issues.
Leveling for Optimal Drainage:
- Tank-to-valve slope: Ensure the tank slopes toward the drain valve
- Overall RV level: Use a bubble level to check front-to-back and side-to-side level
- Drain valve position: Verify the valve is at the lowest point of the tank
- Stabilizer jack adjustment: Use jacks to fine-tune RV position for drainage
- Leveling block positioning: Adjust blocks to achieve proper slope
Signs of Improper Leveling:
- Incomplete tank drainage even with fully opened valves
- Water pooling in specific areas of the tank
- Persistent odors from stagnant water
- Slow drainage despite clear valves and vents
- Visible standing water in tank inspection ports
Leveling Best Practices:
- Level before connecting utilities to ensure proper system operation
- Use quality leveling equipment for accurate measurements
- Check multiple points along the RV length and width
- Verify drainage by testing with small amounts of water
- Document optimal positions for future reference at familiar campgrounds
Advanced Troubleshooting for RV Gray Tank Not Draining
Diagnostic Tools and Equipment
Professional RV technicians use specialized tools to diagnose gray tank drainage issues:
| Tool Type | Purpose | Professional Use |
|---|---|---|
| Tank Inspection Cameras | Visual assessment of tank condition | Identify cracks, buildup, and blockage locations |
| Pressure Testing Equipment | Check for leaks or blockages | Detect system integrity issues |
| Multimeters | Electrical system and sensor testing | Verify sensor functionality and wiring |
| Drain Snake Equipment | Remove stubborn blockages | Clear deep clogs mechanical cleaning can’t reach |
| Specialized Cleaning Solutions | Different types of buildup | Target specific contaminants effectively |
Systematic Troubleshooting Approach
When dealing with RV gray tank not draining issues, follow this systematic approach:
- Verify the problem by checking tank sensors and visual inspection
- Test valve operation to ensure proper mechanical function
- Check venting system for blockages or damage
- Assess RV leveling and adjust if necessary
- Attempt cleaning procedures appropriate for the suspected cause
- Test drainage after each intervention
- Document findings for future reference
When to Seek Professional Help
While many RV gray tank not draining issues can be resolved with DIY methods, some situations require professional expertise:
- Persistent problems despite multiple troubleshooting attempts
- Structural tank damage requiring replacement or major repair
- Complex electrical issues with sensor or monitoring systems
- Plumbing modifications needed for improved drainage
- Warranty considerations that require authorized service
Preventing Future RV Gray Tank Drainage Problems
Regular Maintenance Schedule
Establish a regular maintenance routine to prevent RV gray tank not draining issues:
Regular Maintenance Schedule |
Purpose |
|
Monthly Tank Cleaning |
Prevent buildup and maintain system flow. |
|
Quarterly Sensor Cleaning |
Ensure proper tank level monitoring. |
|
Annual Professional Inspection |
Identify potential issues before they become problems. |
|
Seasonal Vent System Cleaning |
Maintain proper air flow for drainage. |
|
Pre-Trip System Checks |
Verify everything works before departure. |
Best Practices for Gray Tank Use
- Use biodegradable soaps to minimize buildup
- Avoid disposing of food waste in gray water drains
- Install and maintain sink strainers to catch debris
- Use enzyme treatments monthly for preventive maintenance
- Monitor tank levels to prevent overflow situations
If you have attempted these troubleshooting steps and the gray tanks still do not drain properly, it may be best to consult a professional RV technician or service center for a thorough inspection and further assistance.

Professional RV Gray Tank Service at RV Depot
When DIY troubleshooting doesn’t resolve your RV gray tank not draining issues, professional service becomes essential. At RV Depot, our certified technicians have the expertise and specialized equipment to diagnose and repair even the most challenging gray tank drainage problems.
Our Gray Tank Service Capabilities:
- Comprehensive system diagnosis using professional-grade equipment
- Tank cleaning and restoration services for heavily clogged systems
- Valve repair and replacement with quality components
- Vent system inspection and repair to ensure proper operation
- Sensor calibration and replacement for accurate monitoring
Our experienced service team understands that RV gray tank not draining problems can quickly escalate from minor inconveniences to major issues that affect your ability to enjoy your RV. We use proven diagnostic techniques and quality replacement parts to ensure long-lasting repairs.
Don’t let RV gray tank not draining issues disrupt your camping adventures. Our expert technicians are here to help you get back on the road with confidence in your RV’s systems. Ignoring RV gray tank not draining problems can lead to more serious issues including tank damage, plumbing system failures, and potential health hazards from standing wastewater. Professional service at the first sign of problems can prevent costly repairs and ensure your RV remains safe and comfortable.
📍 Visit: 4319 N. Main St, Cleburne, TX 76033 📱 Call or text: (817) 678-5133 💻 Browse Inventory: rvdepottx.com
Questions about full-time RV living? Join thousands of Texans who’ve discovered that home isn’t a place—it’s wherever you park it. Full-Time RV Living Community

