Your RV awning is more than just shade—it’s your outdoor room, weather protection, and often the centerpiece of your campsite setup. But like all RV components, awnings endure significant stress from wind, sun, rain, and constant use. Recognizing the early warning signs of awning problems can save you from expensive RV awning repair costs, dangerous failures, and ruined camping trips.
At RV Depot in Cleburne, Texas, we’ve seen every type of awning failure imaginable. From minor fabric tears that became major RV awning repair disasters to motor failures that left families stranded without shade in 100-degree heat, we know how quickly small problems become big RV awning repair emergencies. Our decades of RV awning repair experience has taught us that prevention is always more cost-effective than emergency repairs.
Here are the 5 critical signs that indicate your RV awning repair can’t wait any longer.
1. Fabric Damage: More Than Just Cosmetic Issues
What to Look For:
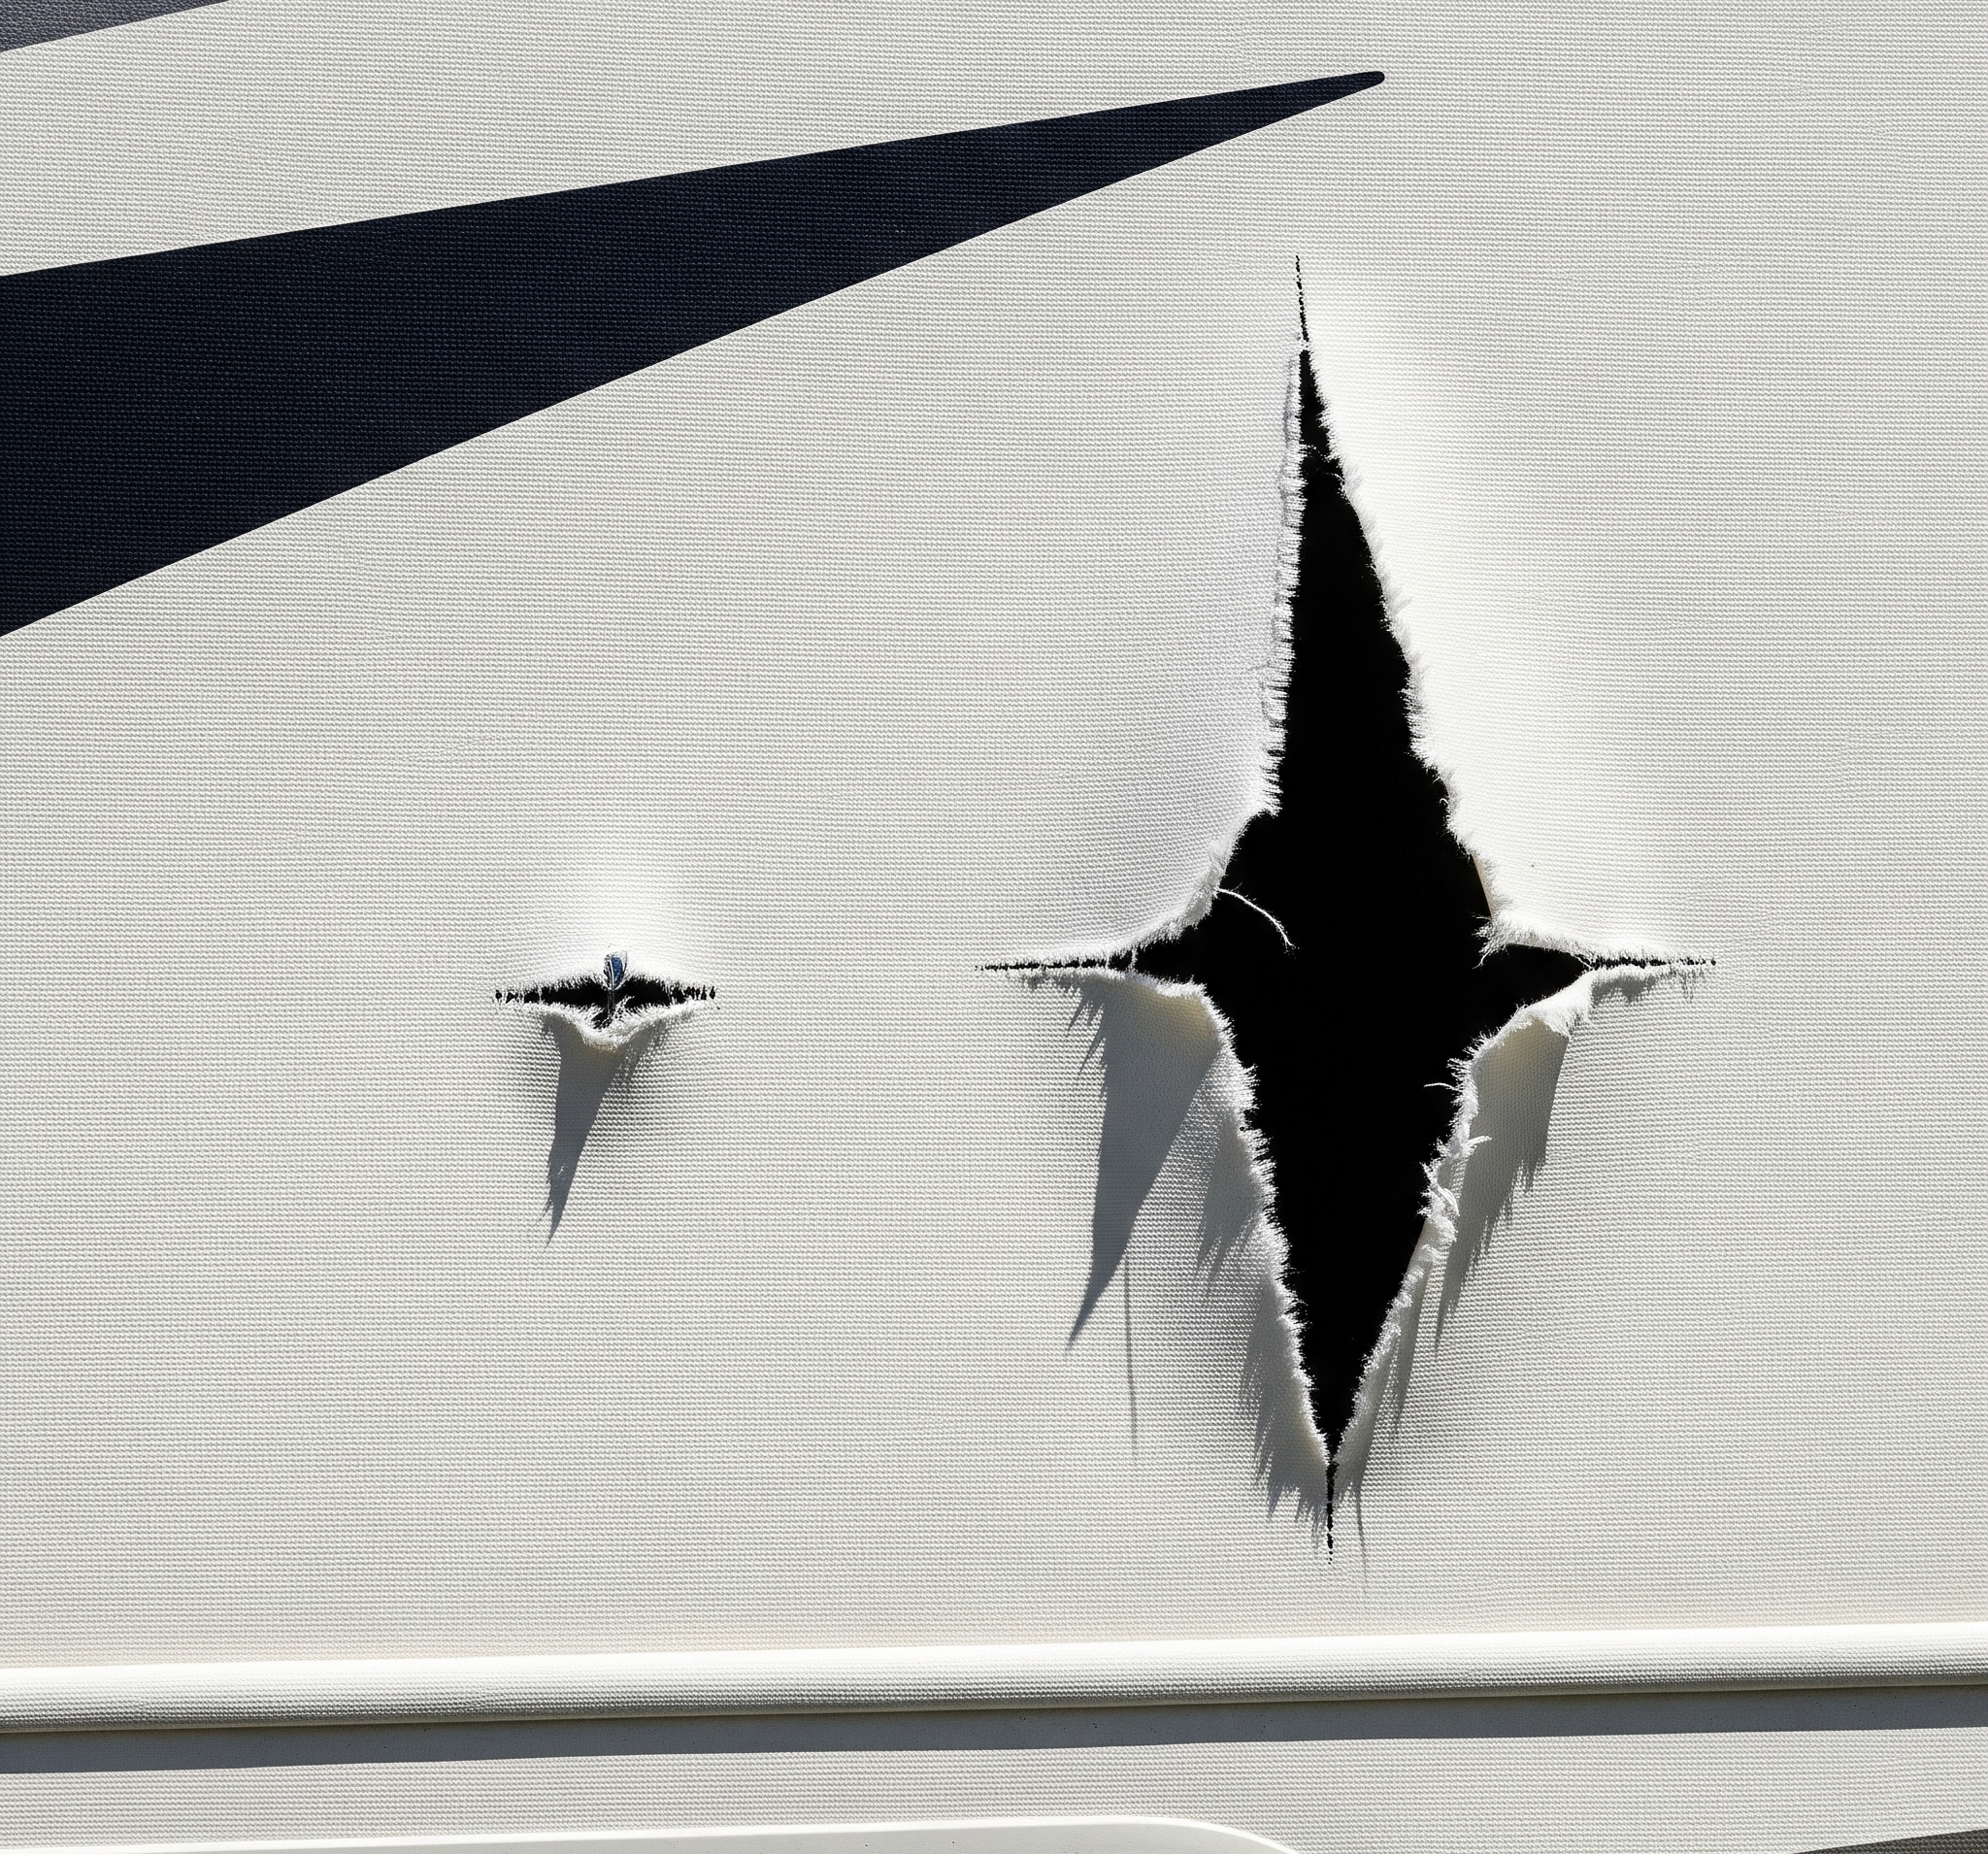
- Small tears or holes (even pinhole-sized)
- Fading, chalking, or discoloration
- Fraying edges along the hem or roller
- Mildew stains or black streaks
- Fabric sagging between support arms
Why Small Problems Become Big Disasters
RV awning fabric endures incredible stress that often leads to costly RV awning repair needs. A typical 18-foot awning can catch over 400 pounds of wind force at just 25 mph winds. Once fabric integrity is compromised, even small holes can rapidly tear into massive RV awning repair emergencies that require complete fabric replacement.
Real-World RV Awning Repair Example: A customer ignored a small 2-inch tear in their vinyl awning fabric. During a weekend trip to Lake Texoma, moderate winds turned that tear into a 6-foot rip, destroying the entire awning and requiring emergency RV awning repair services. What could have been a simple patch repair became a $1,800 RV awning repair job.
Fabric Damage Assessment Guide:
| Damage Type | Repair vs. Replace | Urgency Level |
|---|---|---|
| Small holes (under 1 inch) | Patch repair possible | Medium – repair before next trip |
| Tears along edges | Professional repair needed | High – could worsen quickly |
| Multiple small damages | Consider replacement | High – indicates overall wear |
| Large tears (over 6 inches) | Replace immediately | Critical – unsafe to use |
| Mildew throughout fabric | Replace – health hazard | High – compromises material integrity |
Prevention Tips:
- Clean awning fabric monthly with mild soap and soft brush
- Allow fabric to dry completely before retracting
- Apply UV protectant annually to prevent sun damage
- Inspect fabric after every storm or high-wind event
- Schedule annual professional RV awning repair inspections
The National Weather Service provides detailed wind safety guidelines that help RV owners understand when wind conditions become dangerous for extended awnings. These official guidelines recommend retracting awnings when sustained winds exceed 15-20 mph, validating the importance of monitoring weather conditions and maintaining awning integrity.
2. Operational Difficulties: When Smooth Becomes Struggle
Electric Awning Warning Signs:
- Motor running but awning not moving
- Grinding or unusual noises during operation
- Awning stops mid-extension or retraction
- Remote control becomes unresponsive
- Motor overheating (burning smell)
Manual Awning Red Flags:
- Hand crank becomes increasingly difficult to turn
- Awning feels “sticky” during extension
- Unusual resistance when retracting
- Crank handle slips or doesn’t engage properly
The Hidden Dangers of Ignoring Operation Issues
A malfunctioning awning isn’t just inconvenient—it’s dangerous. Electric awning motors that overheat can cause electrical fires. Manual awnings with damaged mechanisms can suddenly release, causing injury or property damage.
Case Study: Last summer, a family’s electric awning motor failed while extended during a thunderstorm at Palo Duro Canyon State Park. Unable to retract their awning, they watched helplessly as 40-mph winds shredded the fabric and bent the support arms. Total repair cost: $3,200. Cost of preventive motor service: $150.
DIY Troubleshooting Steps:
- Check Power Supply: Verify 12V power at the awning motor
- Inspect Remote Battery: Replace remote control batteries
- Examine Wiring: Look for loose connections or damaged wires
- Test Manual Override: Most electric awnings have emergency manual operation
- Listen for Motor Sounds: Grinding indicates internal damage
When to Call Professionals: If basic troubleshooting doesn’t resolve the issue, stop using the awning immediately. Continued operation can cause exponentially more damage.
For visual guides on these troubleshooting steps, check out our TikTok videos at RVdepot where we demonstrate these procedures on actual RV awnings.
3. Sagging and Uneven Extension: Structural Integrity Concerns
Visual Indicators:
- Awning fabric droops noticeably when extended
- One side extends farther than the other
- Fabric appears loose or baggy
- Water pools on the awning surface
- Support arms appear bent or misaligned
Understanding Awning Tension Systems
RV awnings rely on precise spring tension and mechanical alignment. When these systems fail, the awning can’t maintain proper shape or provide adequate support. This isn’t just aesthetic—sagging awnings are prone to catastrophic failure.
Tension Problem Diagnosis:
| Symptom | Likely Cause | Risk Level |
|---|---|---|
| Center sagging | Spring tension loss | Medium – reduces drainage |
| Edge sagging | Arm mechanism wear | High – structural concern |
| Uneven sides | Bent or damaged arms | Critical – imminent failure risk |
| Excessive fabric droop | Multiple system failures | Critical – replace immediately |
Why Proper Drainage Matters
Awnings are designed with a slight slope for water runoff. When sagging occurs, water pools instead of draining, adding tremendous weight and stress. Just 3 inches of standing water on an 18-foot awning adds over 200 pounds of weight—enough to cause catastrophic failure.
Professional Tip: Never attempt to “shake off” water from a sagging awning. The sudden weight shift can cause immediate structural failure and potential injury.
4. Hardware and Mechanical Issues: The Foundation of Function

Critical Hardware Inspection Points:
- Mounting brackets and lag bolts
- Support arm pivot points and springs
- Roller tube and end caps
- Tension adjustment mechanisms
- All visible bolts, nuts, and fasteners
Common Hardware Failures:
Loose Mounting Hardware:
- Awning pulls away from RV wall
- Visible gaps between brackets and sidewall
- Bolts or screws backing out
- Cracks in mounting area
Support Arm Problems:
- Bent or twisted arms
- Loose pivot joints
- Spring mechanism failure
- Difficulty locking arms in position
Roller Tube Issues:
- Fabric not winding evenly
- Tube rotation problems
- End cap damage or separation
- Internal mechanism failures
The Domino Effect of Hardware Failure
Hardware problems rarely occur in isolation. When one component fails, it places additional stress on surrounding parts, leading to cascading failures. A loose mounting bolt can cause bracket failure, which leads to support arm damage, which ultimately destroys the fabric.
Maintenance Schedule:
- Monthly: Visual inspection of all visible hardware
- Quarterly: Tighten bolts and lubricate moving parts
- Annually: Professional hardware inspection and service
- After storms: Immediate inspection for damage
5. Electric Motor and Control System Malfunctions
Motor Warning Signs:
- Slow or hesitant operation
- Intermittent function (works sometimes, not others)
- Overheating motor housing
- Burning electrical smell
- Tripped circuit breakers
Control System Issues:
- Unresponsive wall switch
- Remote control range problems
- LED indicator malfunctions
- Erratic awning movement
Understanding Electric Awning Systems
Modern RV awnings use 12-volt DC motors with sophisticated control systems. These motors are designed for specific duty cycles—typically 2-3 minutes of continuous operation with cool-down periods. Exceeding these limits causes overheating and premature failure.
Motor Failure Prevention:
| Best Practice | Why It Matters | Frequency |
|---|---|---|
| Avoid continuous operation | Prevents overheating | Every use |
| Keep motor clean and dry | Prevents corrosion | Monthly |
| Check electrical connections | Ensures proper power delivery | Quarterly |
| Test manual override | Provides emergency backup | Annually |
Emergency Procedures for Motor Failure
When your electric awning motor fails while extended:
- Locate manual override crank (usually stored inside RV)
- Insert crank into motor end cap (specific to your awning model)
- Turn clockwise to retract (most models – check manual)
- Retract slowly and steadily to avoid binding
- Secure awning completely before troubleshooting
Safety Warning: Never attempt to force a stuck electric awning. The motor gears can be damaged, making manual override impossible.
When to Attempt DIY vs. Professional RV Awning Repair
DIY-Friendly Repairs:
- Fabric cleaning and minor patching
- Lubrication of moving parts
- Tightening loose hardware
- Replacing worn travel locks
- Basic electrical troubleshooting
Professional Repair Required:
- Motor replacement or internal repair
- Structural arm damage
- Mounting bracket problems
- Complete fabric replacement
- Spring tension adjustment
RV Depot’s Expert Awning Services
Comprehensive Awning Inspection
Our certified technicians perform detailed inspections covering:
- Fabric integrity and UV damage assessment
- Hardware torque specifications and wear analysis
- Motor performance and electrical system testing
- Structural alignment and tension verification
- Weather seal and mounting point evaluation
Advanced Repair Capabilities
- On-site motor replacement for most awning brands
- Custom fabric installation with premium materials
- Structural repair and reinforcement for damaged arms
- Electrical troubleshooting with modern diagnostic equipment
- Preventive maintenance programs to extend awning life
Don’t Wait Until It’s Too Late
RV awning failures rarely happen at convenient times. They occur during family reunions, holiday weekends, and once-in-a-lifetime trips when replacement parts are unavailable and repair shops are closed.
The RV Depot Difference:
- Preventive maintenance costs less than emergency repairs
- Quality parts inventory means faster repair times
- Experienced technicians prevent costly mistakes
- Warranty protection on all repair work
Ready to ensure your awning is adventure-ready? 📍 Visit: 4319 N. Main St, Cleburne, TX 76033 📱 Call or text: (817) 678-5133 💻 Browse Inventory: rvdepottx.com
Your awning provides the comfort that makes RV travel special. Join thousands of Texans who’ve discovered the ins and outs of awning care. Full-Time RV Living Community
5 Safe Methods to Keep It Spotless👇
